
Generate an API key for your certifier
A step-by-step guide to issuing a scoped API token so an external certifier can access your evidence files securely.
What is an integration API key?
An integration is a scoped API token that lets an external service, such as the certifier auditing your compliance, access your organisation’s evidence files without using a personal login. You decide exactly what each token can do and how long it lasts.
Scoped access
Each key only grants the permissions you select, nothing more.
Time-limited
Set an expiration so access ends automatically when the audit is over.
Revocable
Disable a key at any time to cut off access immediately.
Who this guide is for
Organisation administrators who need to give a certifier or external auditor programmatic access to their evidence files.
Before you start
- Two-factor authentication is enabled on your account. It is required to create an API key, and the 2FA guide shows how to set it up.
- You are an administrator of the organisation, or a member with the Create integration permission.
- Your encryption keys are unlocked. Only needed if the certifier must decrypt files.
- A secure channel to hand the credentials over, such as a password manager or secrets vault.
- Clarity on which scopes the certifier needs, so you can grant least privilege.
2FA is mandatory to create a key
Without 2FA enabled, the Create integration action is blocked. Enable it once on your account and you are ready to issue keys. From then on, whenever you create or rotate a key, a Verify your identity prompt asks for the current 6-digit code.
Generating the API key
Open your organisation settings
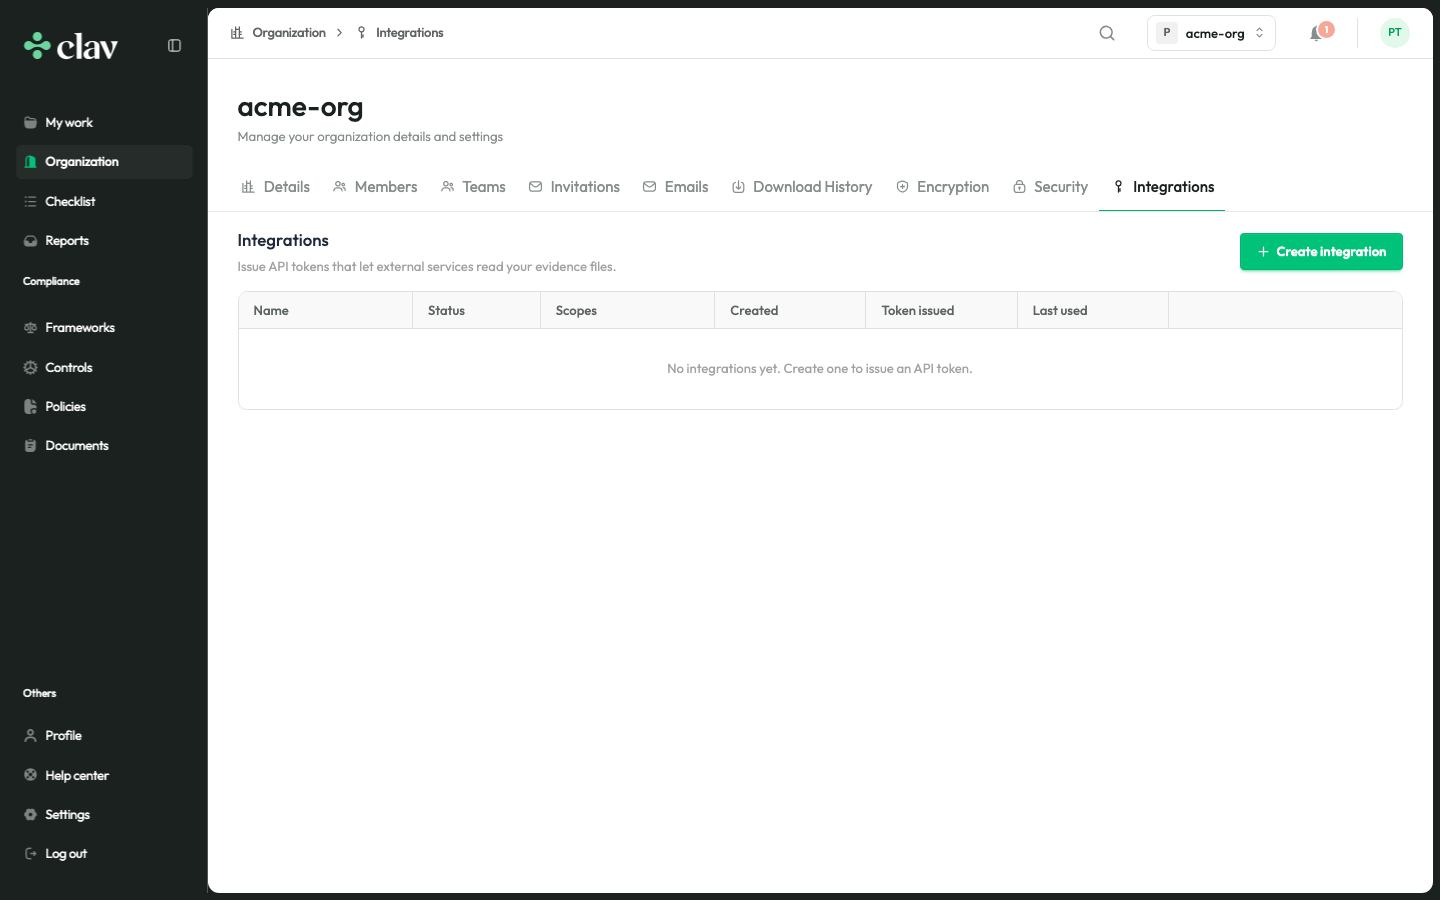
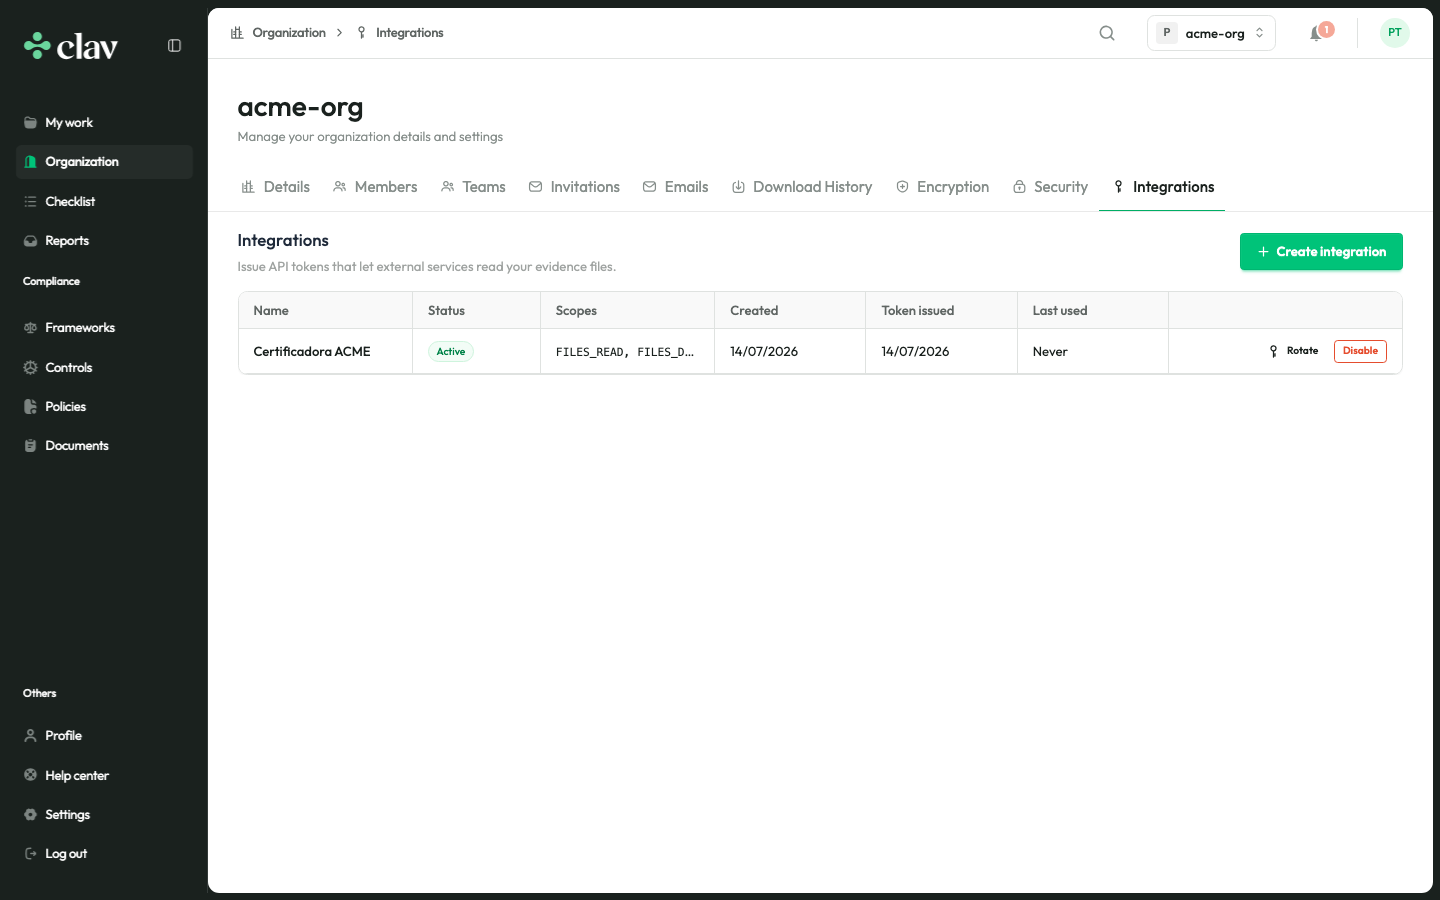
In the platform, go to your organisation’s settings and open the Integrations tab. This is where every API key issued for your organisation is listed.
Start a new integration
Click Create integration in the top-right corner. You need the Create integration permission; administrators have it by default.

Optional: use the certifier preset
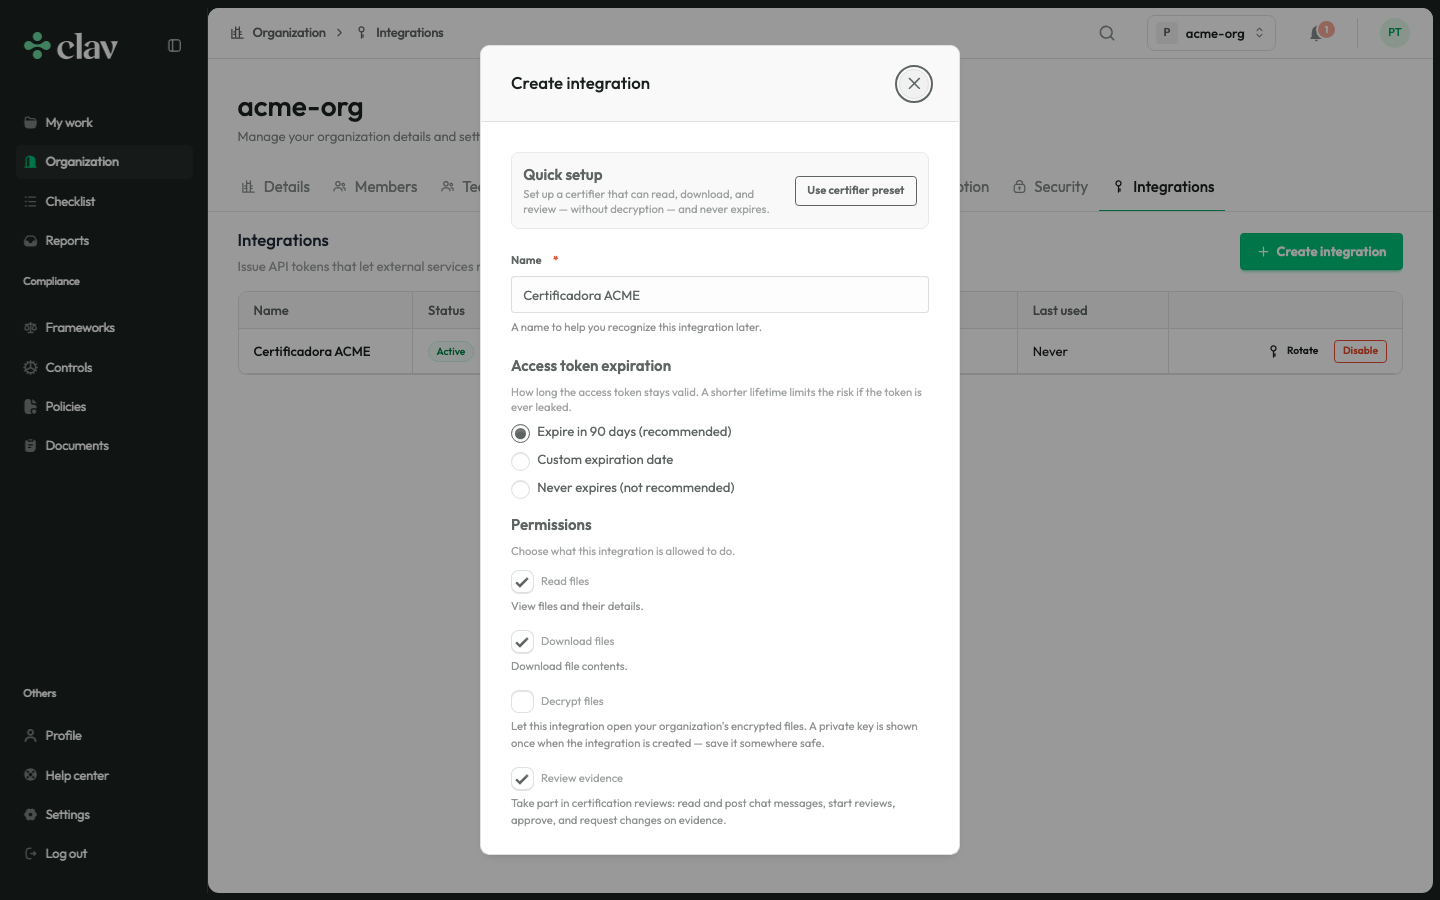
At the top of the dialog, the Quick setup box offers a one-click preset that configures a certifier able to read, download and review, without decryption. You can adjust anything afterwards, or skip the preset and configure manually.

Name the integration
Use a name that identifies who receives the access, since that is how it appears in the list afterwards.
Set the access token expiration
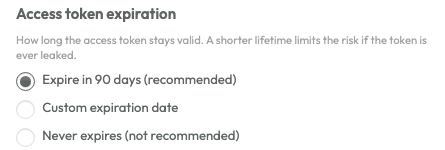
Choose how long the token stays valid. We recommend 90 days so a leaked token has a limited lifetime. You can also pick a custom date up to 180 days or, only when strictly necessary, choose that it never expires.
Choose the permissions
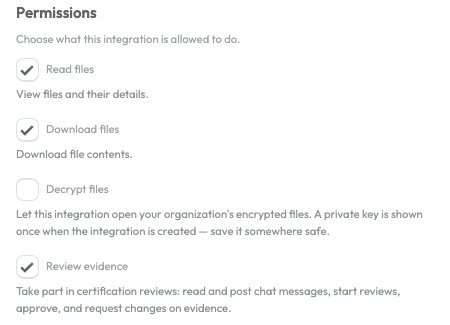
We recommend keeping Read files, Download files and Review evidence enabled, and leaving Decrypt files off unless the certifier truly needs to read decrypted content.
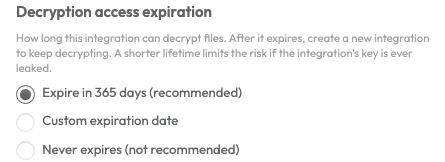
Set the decryption access expiration
Only needed if you enabled Decrypt files. Unlock your encryption keys first so the platform can wrap your organisation key for the integration. We recommend 365 days, up to a maximum of 730.
Create and copy the credentials
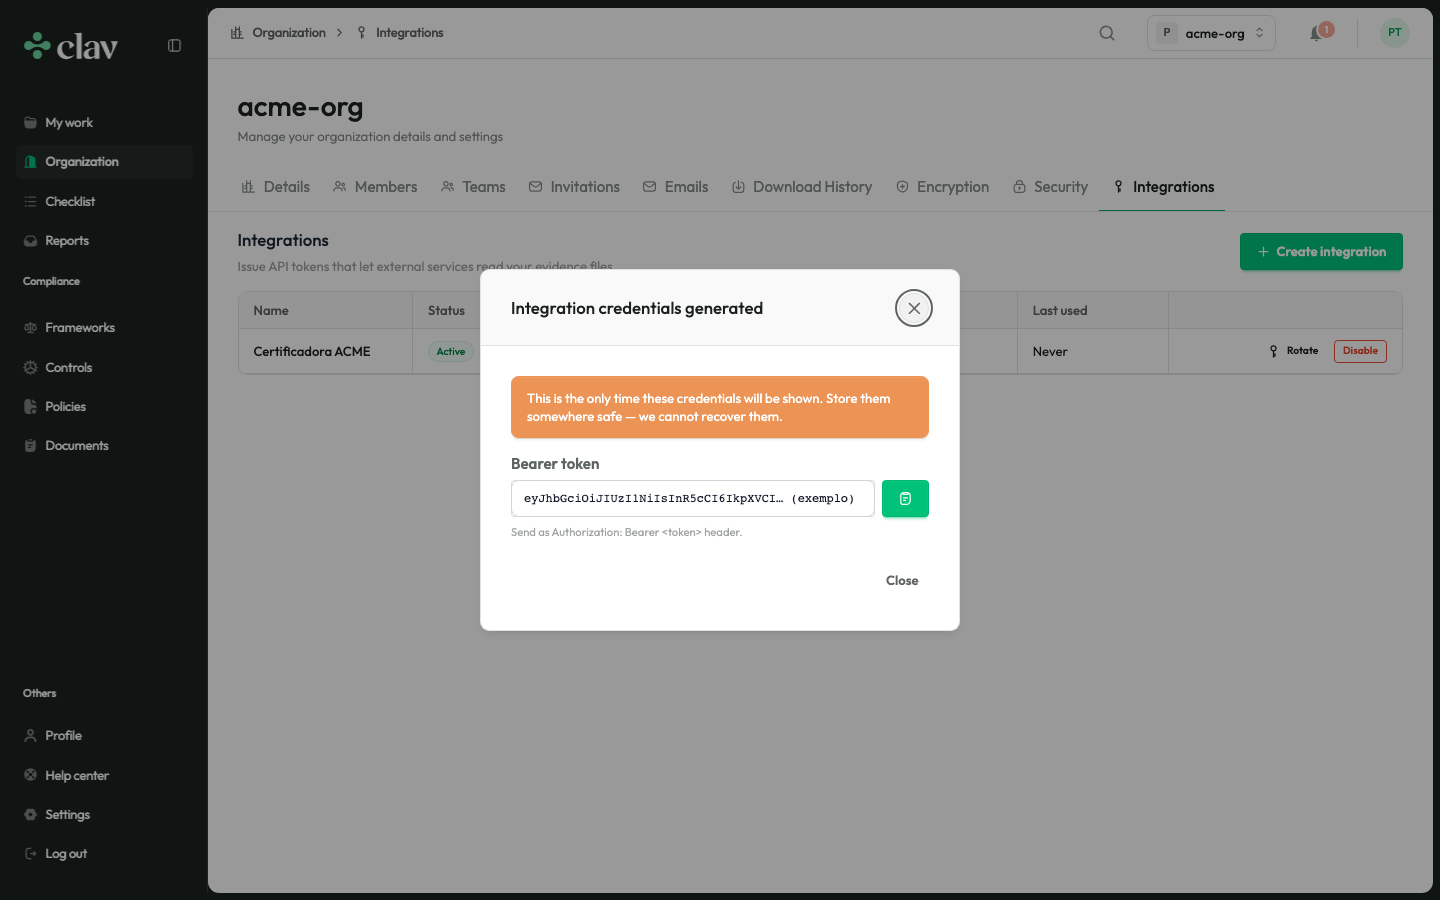
Click Create and confirm the 6-digit code. The platform then shows the Bearer token and, if you granted decryption, the integration private key.
Deliver the credentials securely
Share the token through a secure channel, never plain email. The certifier
authenticates each request by sending it in the Authorization: Bearer header.
Credentials are shown only once
The Bearer token and private key are never stored in a recoverable form. If you lose them, you must delete the integration and create a new one.
Understanding the access scopes
Scopes define what the certifier can do with the token. Grant only what the audit requires.
| Scope | What it allows |
|---|---|
files:read | List files and read their metadata. |
files:download | Generate presigned URLs to download files. |
files:decrypt | Decrypt files. Generates a dedicated keypair and wraps your organisation key. |
review | Read and post certification messages, start reviews, approve and request changes. |
wallet:verify | Open wallet verification challenges, check and revoke verified wallets. |
Using the token
The certifier authenticates every request by sending the token in the
Authorization header:
Authorization: Bearer <token>Security best practices
Prefer short expirations
A token that expires bounds the damage if it ever leaks. Avoid never-expires tokens unless a certifier truly requires uninterrupted access.
Grant least privilege
Only enable the scopes the certifier needs for the current audit. Prefer a new, narrower integration over over-granting an existing one.
Rotate periodically
Rotating issues a fresh secret and invalidates the old one, which is useful at the end of each audit cycle.
Revoke when finished
When the audit is over, or a key may be compromised, disable the integration. Access stops the moment it is revoked.
Frequently asked questions
Who can create an API key?
Organisation administrators, and any member granted the Create integration permission. If you do not see the button, ask an administrator to grant the permission or to create the key for you.
Why do I need two-factor authentication to create a key?
Issuing an API key is a sensitive action, so the platform requires 2FA and asks you to confirm a code each time you create or rotate a key. Without it, the action is blocked.
I lost the token. Can I see it again?
No. The Bearer token and the private key are shown only once, at creation time, and are never stored in a recoverable form. If you lose them, delete the integration and create a new one.
Does the certifier need the decryption scope?
Only if they must read the decrypted contents. If reading metadata and downloading the still-encrypted files is enough, grant just read and download. The decryption scope generates a dedicated keypair and requires you to unlock your encryption keys during creation.
What happens when the token expires?
Requests made with an expired token are rejected. To restore access, rotate the token from the integrations list or create a new integration. A shorter expiration limits the impact if a token is ever leaked.
How do I revoke access?
Open the Integrations tab, find the integration, and disable it. Access is cut off immediately. Do this as soon as an audit ends or if you suspect a credential was exposed.
How should I send the credentials to the certifier?
Use a secure channel such as a shared password manager or a secrets vault, never plain email or chat.